Glenn Liput of JLEC Electrical Ltd. in Bradford (http://www.jlec.co.uk) has kindly sent us photos of a star ceiling project with a few features which might be of interest to anyone thinking of putting stars into a downstairs room.
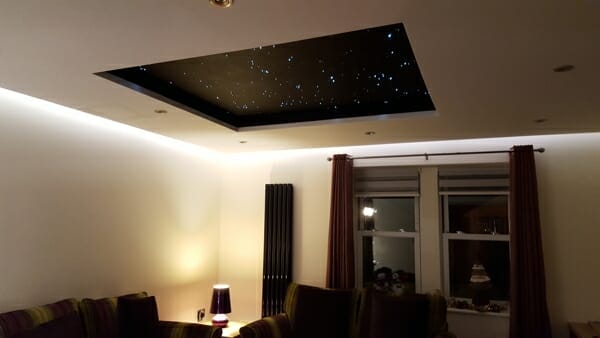
Since there was no access to the ceiling from above the room the fibre optics had to go into panels, rather than directly into the existing ceiling. Also, the stars were part of a larger decorative lighting scheme which involved dropping a large part of the ceiling to provide a colour wash effect down the walls using LED tape. So, the first step entailed creating a wooden framework on the ceiling and then fitting plasterboard to this. A coffered area was created towards the centre of the ceiling to accommodate the star panels.
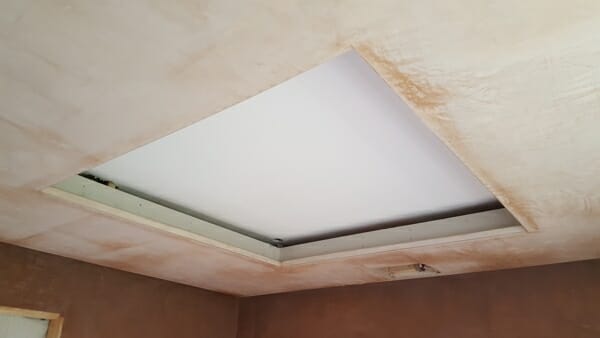
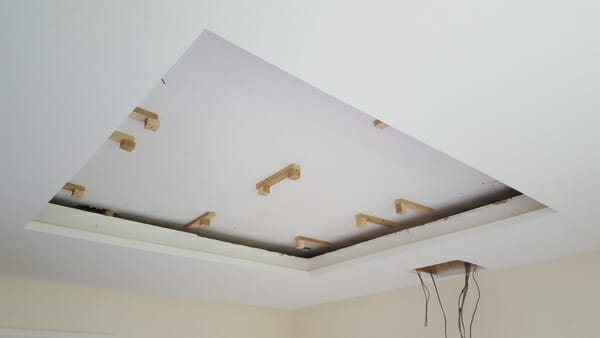

Here the two mdf panels are in place and painted, but the fibres have not yet been trimmed back to the surface.
We normally supply star kits with a readymade “harness” of fibres, but when you’re working with multiple panels this can give rise to some installation issues. If you fit half of the fibres to one panel and then offer that up to the ceiling all of the other fibres will have to follow. So, you end up having to fibre the second panel close to the ceiling, which can be awkward. One way in which people get around this is to ask us to make the fibres a couple of metres longer than they really need to be, so that there’s enough slack available during the installation phase, but this adds to the cost.
Another option is to take the fibres as loose bundles – one for each panel. This means you can handle the panels independently of each other but it also means that once the panels are all in place you’ll need to “terminate” the harness yourself by fitting the common end ferrule – the plug which acts as the interface between the fibres and the light source. This isn’t particularly difficult, but it’s easier on the bench in our workshop than perched up a stepladder.
On larger projects we sometimes offer customers the option of using the same system of optical joints which we use in our Infinity system. This adds cost but can make life much easier for the installer.
In this case since there are just two panels Glenn thought that he might use one of our MiniLED600 light sources. This is an unusual design since it has two LEDs side by side, with two optical ports. In other words, you actually use two separate fibre harnesses, which is very handy for a two-panel installation. The peculiar configuration of this light source means that it’s best suited to installations where colour isn’t needed – just the classic white twinkle. However, since in this case there’s plenty of colour being produced by the LED tape this wasn’t an issue.
Also, Glenn opted to use our Infinity mix fibre bundles, rather than our standard DIY mixture of 0.75mm and 1mm fibres. Infinity mix has fibres in four different diameters to give an enhanced impression depth in the “sky” – hence the name Infinity. We made up two harnesses each with two 100-fibre tails of Infinity mix to give 400 fibres in total. Because Infinity mix includes a lot of 0.5mm fibres, which are very fine and somewhat fiddly to work with, we don’t recommend it when you’re working in the loft, but it does lend itself well to panel-based projects.
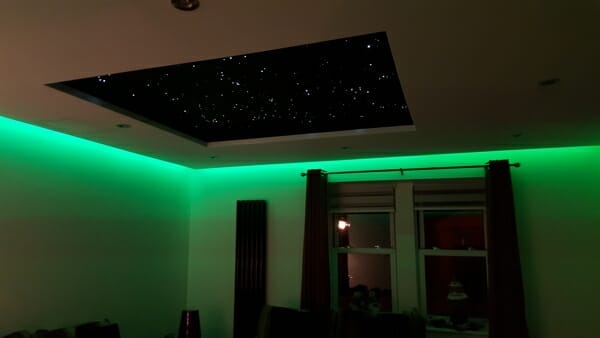
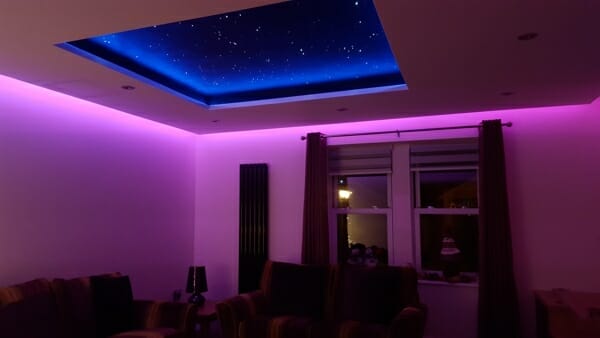
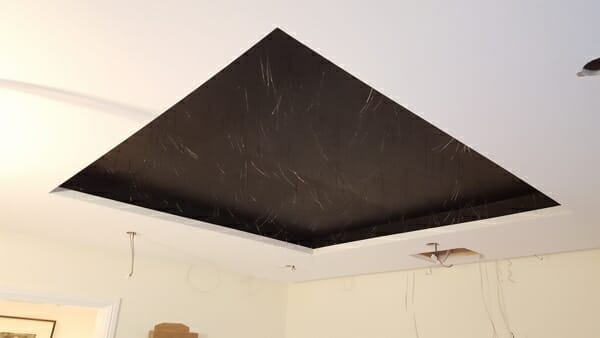
The sequence of photos below shows the RGB wall wash lighting in action and also the blue LED tape which can optionally be used as a secondary effect in the coffered area.