
This was a nicely implemented fibre optic star ceiling, using the prefabricated panel approach. In this case our customer opted to create an 8ft disk of mdf suspended from the ceiling, with space for the light source to sit on top of the disk, out of sight. Since he wanted a reasonably high density of stars, but didn’t need the fibres to be very long, he asked us to make up a custom harness with 200 fibres in an equal mix of 0.75mm and 1mm diameters. In the context of his design this was more cost-effective than buying one of our off-the-shelf DIY kits.

You can see in the photo above, that our customer, Dan, didn’t fill the entire disk, with a uniform distribution of stars, but went for a more natural look. “We used the “chuck a handful of rice” technique you suggested ,” he reported, “and it’s worked beautifully.”
This, as the name suggests, is one way of gauging how a particular number of fibres will fill a space, and also helps to achieve a nice random layout.
“We’re planning another for the bedroom,” he added, “so I’ll be making another order soon.” (We’re delighted to hear that!)
“Thanks for all your help on this,” he concluded. “I’m sitting under its soothing ambient glow as I write and it’s brilliant. Well worth the money!”
Here are a succession of photos taken throughout the project by Dan’s girlfriend, Sara. As you can see, he had plenty of help from friends and family. So, in Dan’s own words:

“The Images are quite self-explanatory and you’ll see that we began with 2 sheets of mdf and heavily primed them before we began. The photos pick up the story where we used 2″ x 2” battens to strap them together.
We then cut the circle with a jig-saw all in one go to ensure a perfect match between the two sides. The pictures don’t show us recycling the off-cuts as plates to reinforce the join between the two sides.Then, the painful part, dismantling our hard work to get it in the house! We had designed the frame/battens to be just small enough to get through the doors and up a winding staircase. Placed on the floor of the room where it would live, we re-assembled.

Several hours of filling, sanding and re-priming later, we put on a couple of thick coats of white emulsion.

Meanwhile Sara counted out 200 grains of rice and, once the paint was dry, we scattered them and drilled the holes for the fibres. With a few extra pairs of hands, we threaded the fibres and taped them into position.
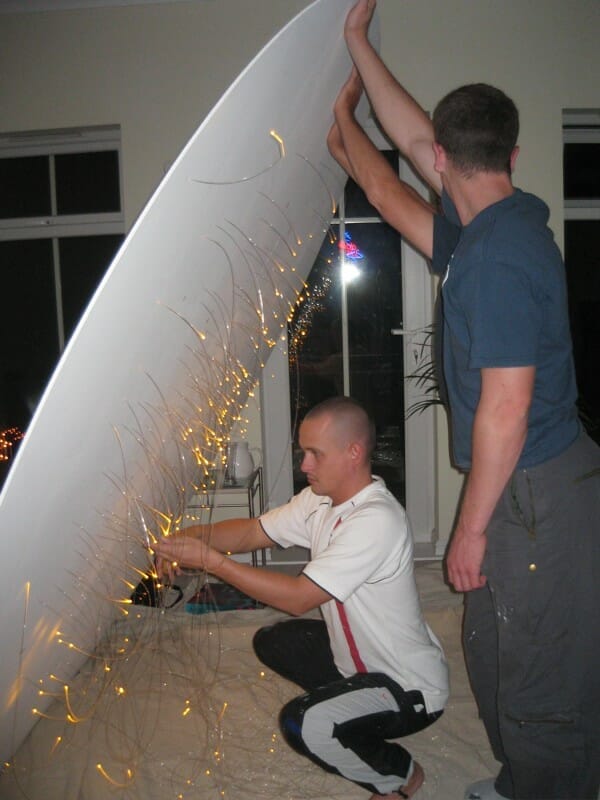
Seeing the interaction of the long, uncut fibres, we were tempted to leave them hanging! They looked really interesting.
Finally, we used heavy duty hooks (normally used to hang children’s swings) and screwed four of them into the ceiling joists. Four corresponding ones were screwed in to the battens on the back of the disk.
The unit weighed a considerable amount at this point and we had been considering the problem of mounting it for some time. With two men lifting the disk up vertically and offering it to the first two hooks, I was able to use chains to attach the first two positions.
The disk was then hanging vertically from the ceiling. This made attaching the other two chains that bit easier.
We had pre-wired the power cable for the lighting unit and plugged it in. And there you have it!
As for light leakage, there is some but it comes from the fibres rather than the lighting unit. This works in its favour as it very slightly lightens the tone of the ceiling itself and silhouettes the disk. I made no special arrangements to shield the light emanating from the unit and it works fine.”